Banners: probably not the most revolutionary craft. But I’m practically addicted. And in the grand tradition of the huswife book, originality is hardly key. Indeed, the most appropriate thing I could do is exactly this: present my own version of the exact same a thousand other people are already doing. Now if I only could have a man write this post for me, while he pretends that he invented the concept – then this would really be a modern book of huswifery.
But since that’s not an option, I’m just going to share this fun craft from a couple of months ago, requested by a friend who was making a beautiful cake for another friend’s baby’s first birthday. She wanted a tiiiiiny banner. And man, do I love a banner.
1. For any banner, you want strips of paper cut into rectangles cut roughly 2:1 length to width. First, I chose eight coordinated papers – one for each letter of the birthday girl’s name, plus one for each end. For these itsy-bitsies, I cut my strips of paper 1.5 in x 3/4 in.
2. Next, fold your papers in half – what my elementary teachers would have called hamburger style. Now, you have tiny 3/4 x 3/4 inch squares.
3. For your last cutting step, put a dot in the exact middle of the open edge of your square. Then cut from both corners of the folded side down to that dot. Now you should have tiny triangles – the closed side should be 3/4 inch long, then come down to a centered point that’s open.
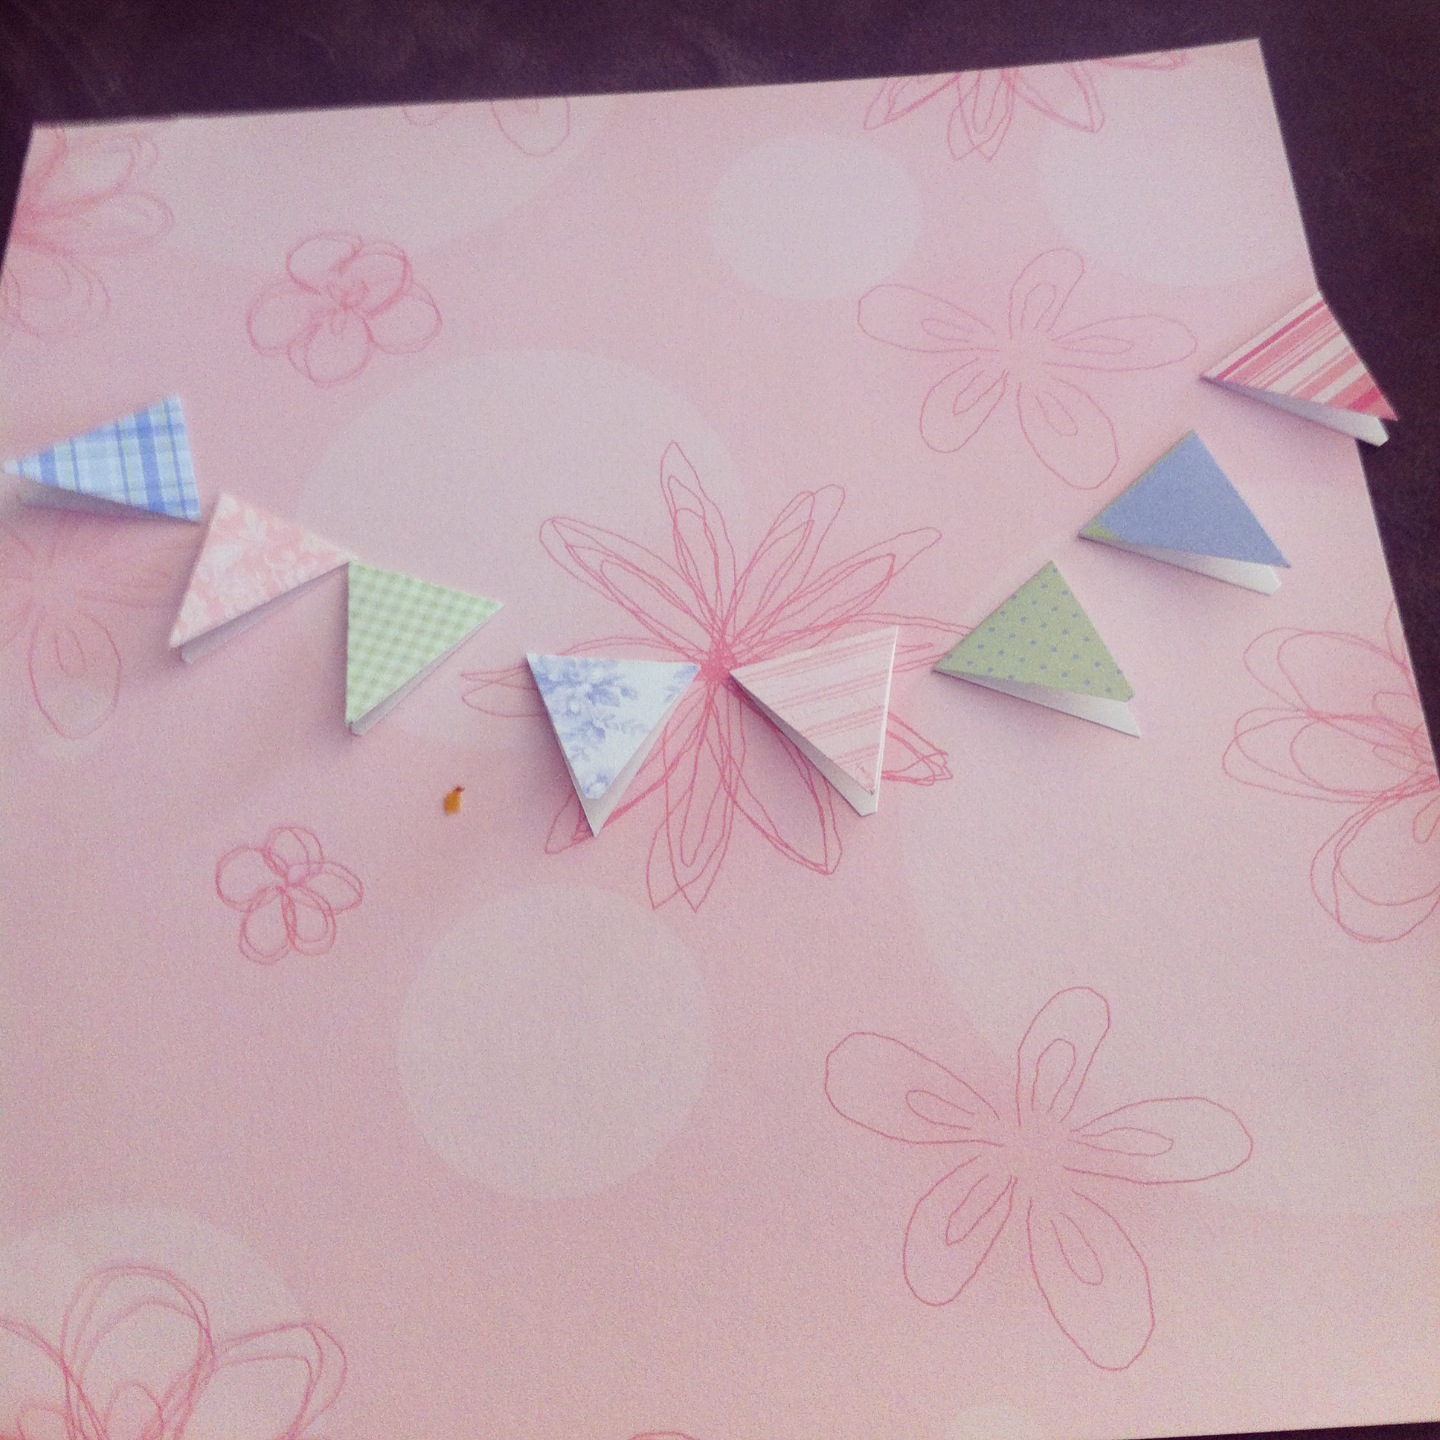
This is what your pennants will look like once they’re cut. After cutting the pennants, I decided on an order. Also, there’s a crumb in the photo. I don’t know what it is.
4. Next, because this was for a birthday banner, I needed to get the birthday girl’s name printed across these tiny pennants. I can see the appeal of using printables for this sort of thing, but I instead decided to pen and ink it. I found a font style I liked and used their sample for a model. First, I sketched the letters down in pencil. Then, I used a scrapbooking pen to trace the outline and fill in where necessary. I don’t imagine a scrapbooking pen is precisely necessary, but I do recommend making sure it’s a high quality, smoothly flowing pen – unless the scratchy lines are an aesthetic you’re going for. You definitely want to do any writing before you string your pennant, in case something goes awry.
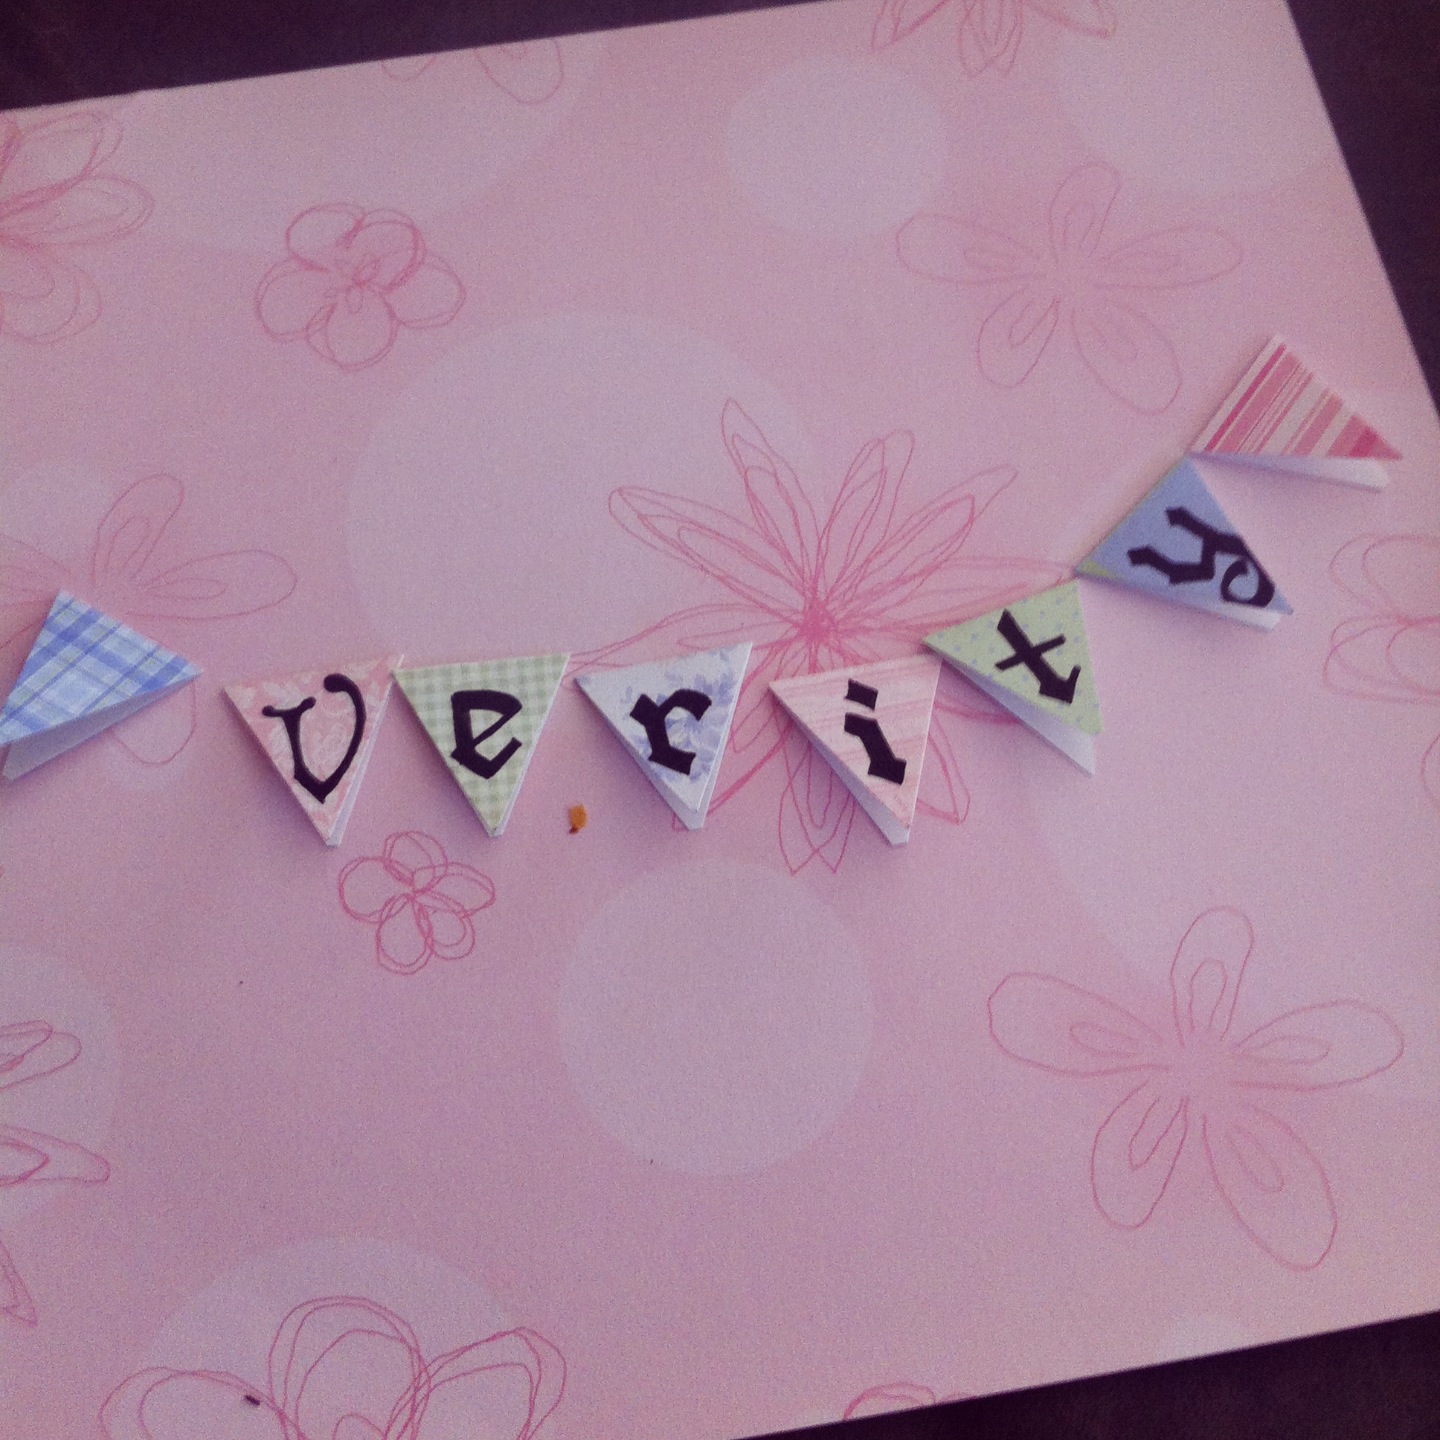
I picked a font based on old calligraphy styles, because the cake was quite posh – I wanted to go crafty, but not too cutesy. Also, yeah, the crumb is still there.
5. Now, you’re ready to string! I used embroidery thread because it was a good thickness for a tiny banner, and I had lots of lovely colors on hand to choose from. I tend to knot on either side of each pennant. So, first, tie a knot. Next, apply glue all over one half of the inside of the pennant – be careful to get it all the way down to the tip and not to clump too much up near the top. I used a gluestick – they’re simple and fairly clean. Seal the pennant together over the string, near to the knot. And finally, tie another knot – and repeat for the next pennant strip.
6. If you’re using the mini-banner for a cake, you’ll need some way to suspend your banner. To do this, I fixed the banner to two kebob sticks – I had originally planned on using chopsticks, but the kebob sticks were longer and I thought the point might make it easier to get the banner set up in the cake.
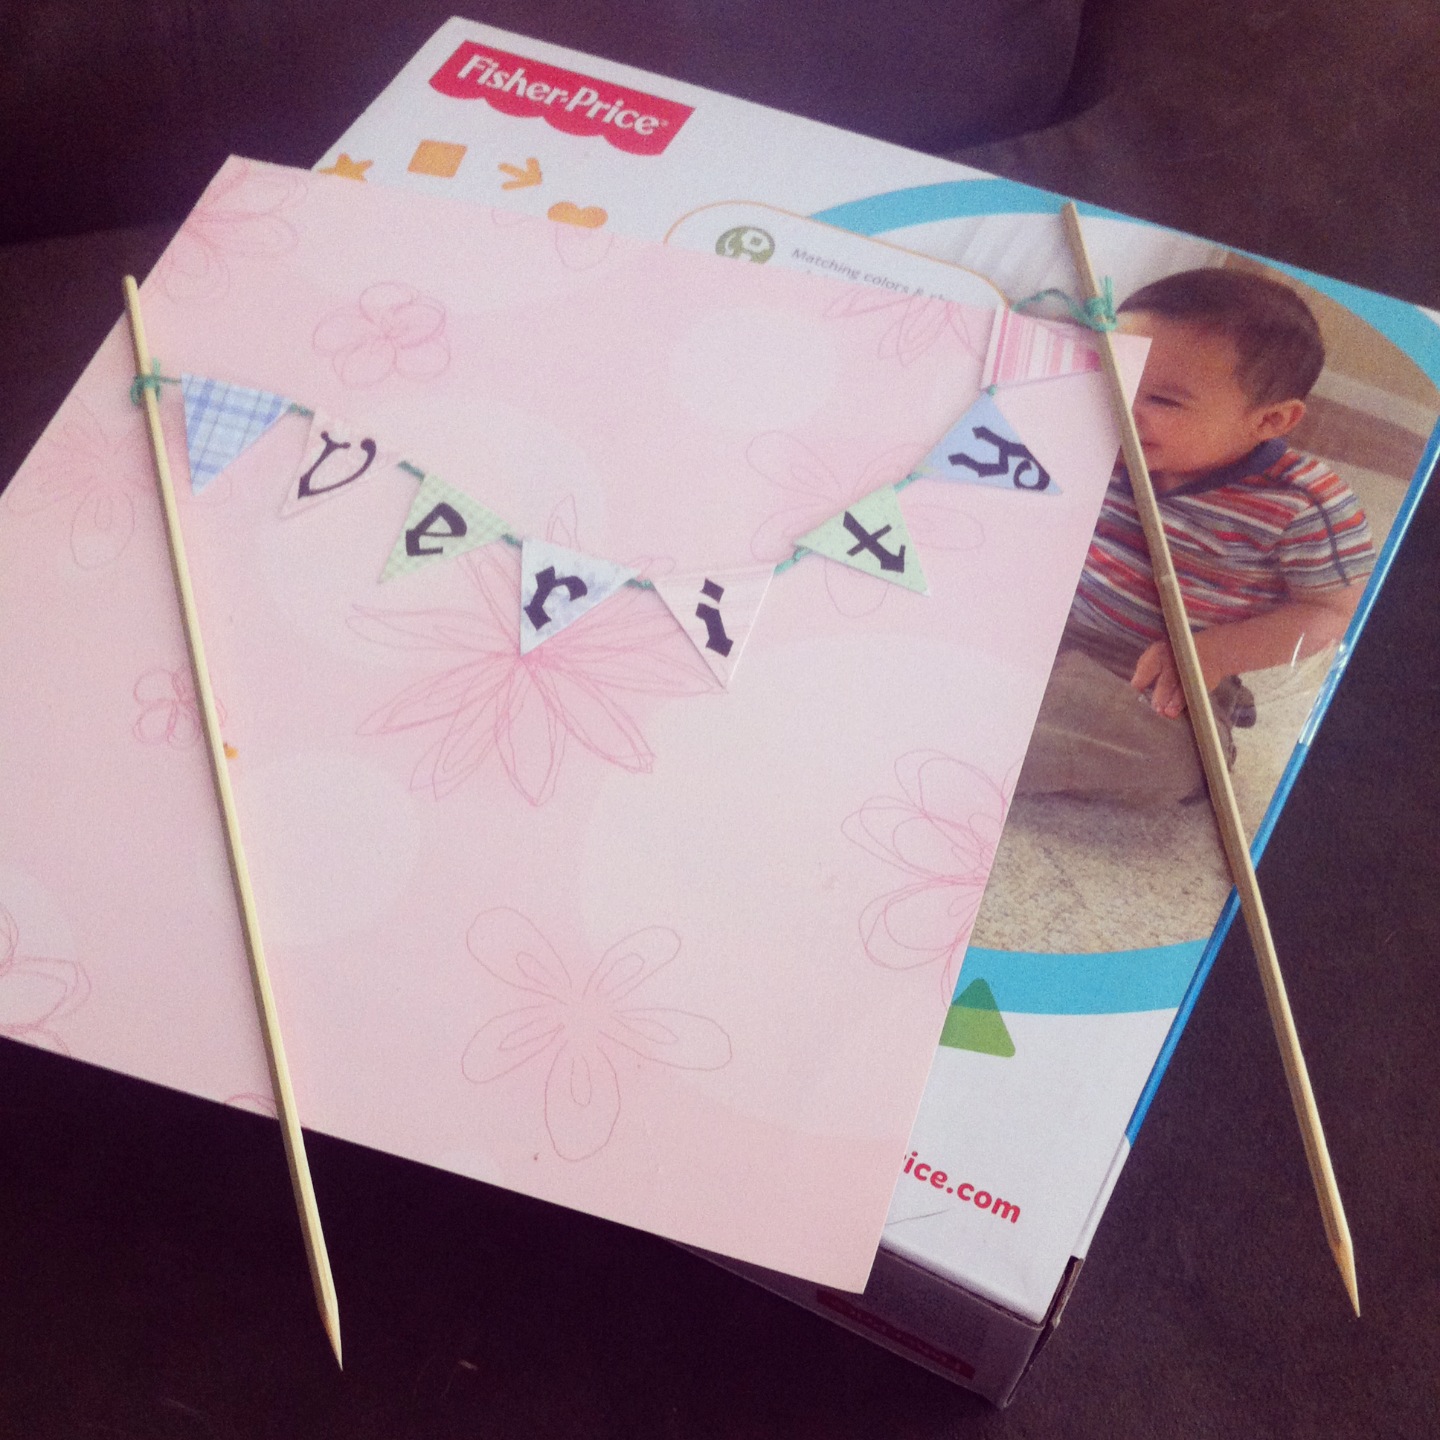
Here’s the banner, all assembled. I left a little more room on the ends so that I could wind or unwind the ends of the string from around the sticks as necessary to raise or lower the banner.
Now, the banner was all done! Off to the party, where Chef Friend affixed it to her amazing cake:
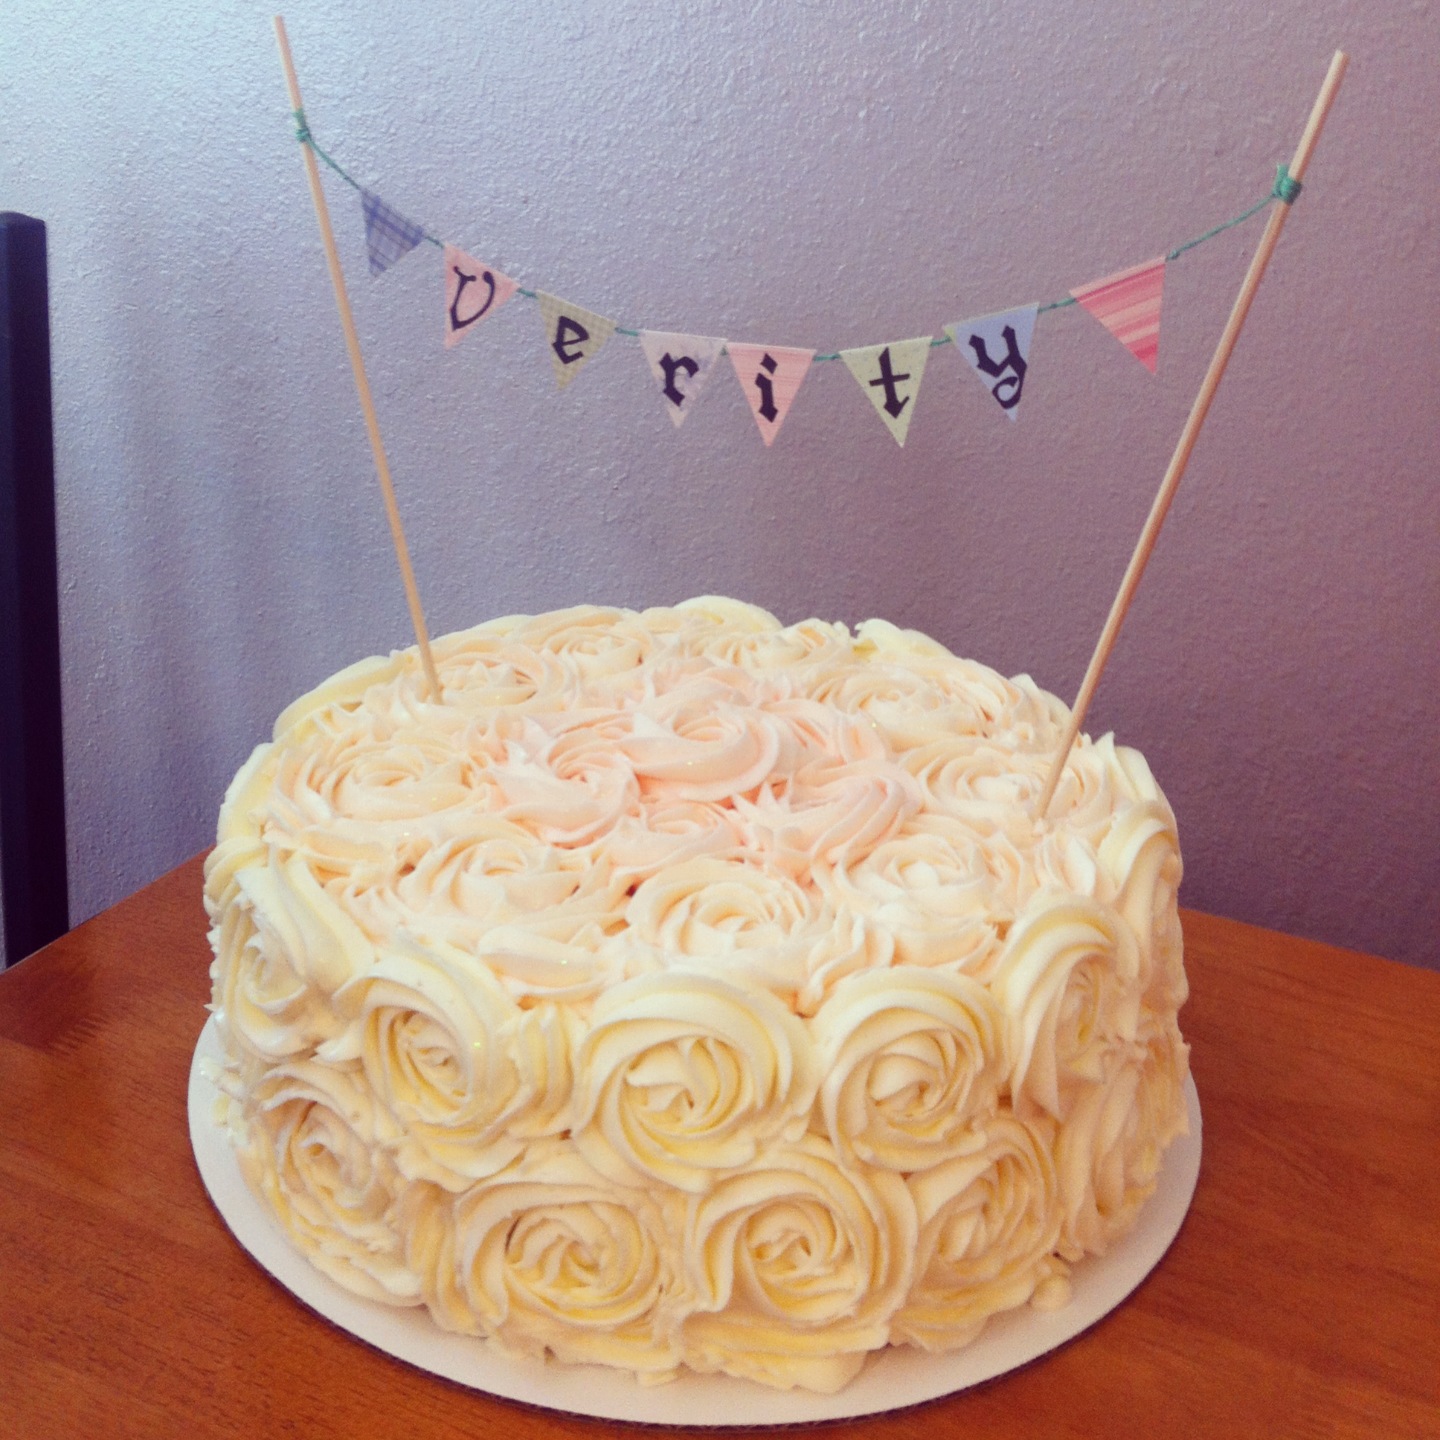
Here’s the banner in context! Isn’t that cake amazing? Buttercream roses with the most beautiful shading – my baking friend is truly very talented.
I can hardly take credit for the most breathtaking part of this photo, but the cake also highlights when a banner is particularly useful – candles would have wrecked that gorgeous frosting work. Fifteen minutes or so of work for a slightly more personalized candle alternative.
