You see, friends, I am trying to alternate between recipes, Early Modern trivia, and domestics. We shall see how it goes.
So, today: shipping cookies safely. I poked around a bit, in December, when I decided to send cookies as holiday gifts to some friends who are far afield, but I wasn’t totally satisfied with any of the sites I found. Most seemed either Too Fussy (bubble-wrapping each, packing peanuts, the Whole Nine Yards) or clearly didn’t have decorated cookies in mind at all. I liked the idea, though, because it’s a reasonably budget friendly, easily organized present for several people that still has room to be tailored for each person or each couple.
And why am I posting this now, you ask? After all, we’re months away from the next Holiday Sweets Attack.
Incorrect. February 14th approacheth, and everyone knows that it’s not just for couple-y types. I can’t say I’ll be repeating this baking and shipping plan for this particular Valentine’s, but I’ll be keeping it in mind when I myself become the Friend Who Is Far Afield.
So, steps 1 through 6: Prepare, refrigerate, cut, bake, cool, and decorate the cookies.
I’m afraid I can’t say too much about steps 1, 2, or 4, because the recipes I used are not my own. My sugar cookie recipe is near to Mark Bitman’s “Refrigerator (Rolled) Cookies” in How to Cook Everything, just with a smidgen less sugar and more vanilla. Ah, and cream instead of milk. I also usually use part Irish butter instead of normal unsalted for, oh, about a a quarter of the total butter in anything I want to be Extra Nice, like holiday presents. Cut back on the salt, a bit, accordingly.
My gingerbread recipe, then, is modified from the “Soft Glazed Gingerbread” in Tartine. The biggest modification is that I don’t glaze the cookies or use a patterned pin or plaque – I’m just using the dough to make rolled cookies. I also, though, cut back on the cocoa powder a bit and use maple syrup instead of corn syrup – a good substitution for gingerbread generally, I think. Tartine also asks you to refrigerate overnight; I usually refrigerate my cookie dough for about four hours before rolling.

This is my only advice on Step 3: My grandmother told my mother, who told me, that you should always push as many cutters down into the dough as you possibly can before moving any of them; that way you use as much as you can each time and aren’t overworking the dough by constantly re-rolling.
As for step 5, well – I’m not likely to be a Sunday Sweet in my lifetime. But, if you’re not used to decorating at all, I perhaps have one or two useful ideas. First: assemble your decorating tools. Better decorators than I have those Fancy Icing and Piping Tools. I have Store Bought Cookie Icing.
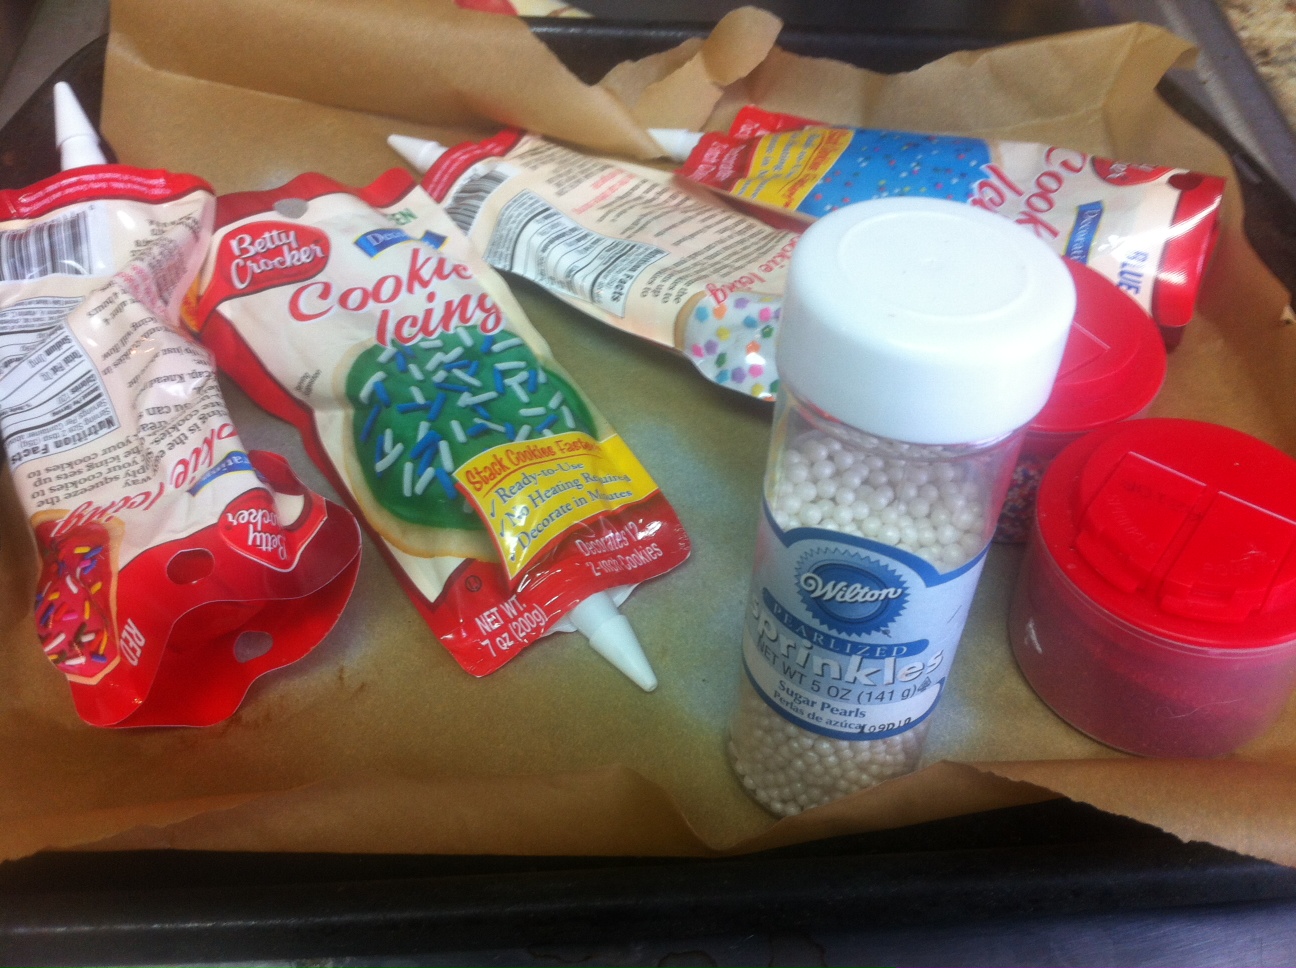
Someday, I will test enough homemade icings to discover one that comfortably ships and makes nice neat lines. I will buy a fancy decorating tool, and my cookies will be as Completely Natural as cookies can be and Magnificent.
Until then, these cookie icings set up nicely and aren’t distracting in taste.
I suggest getting a palette of three to four colors, with coordinating sprinkles and fancies. I especially like the little sugar pearls – they add nice dimension, and for Christmas cookies they make great ornaments or gingerbread-man eyes.
I decorate in batches of shapes, so that I get used to the corners and turns and lines and such. If you’ve got them all laid out in front of you in rows or somesuch, remember to work away from your starting point – I’m a righty, so that’s moving down and to the right for me.
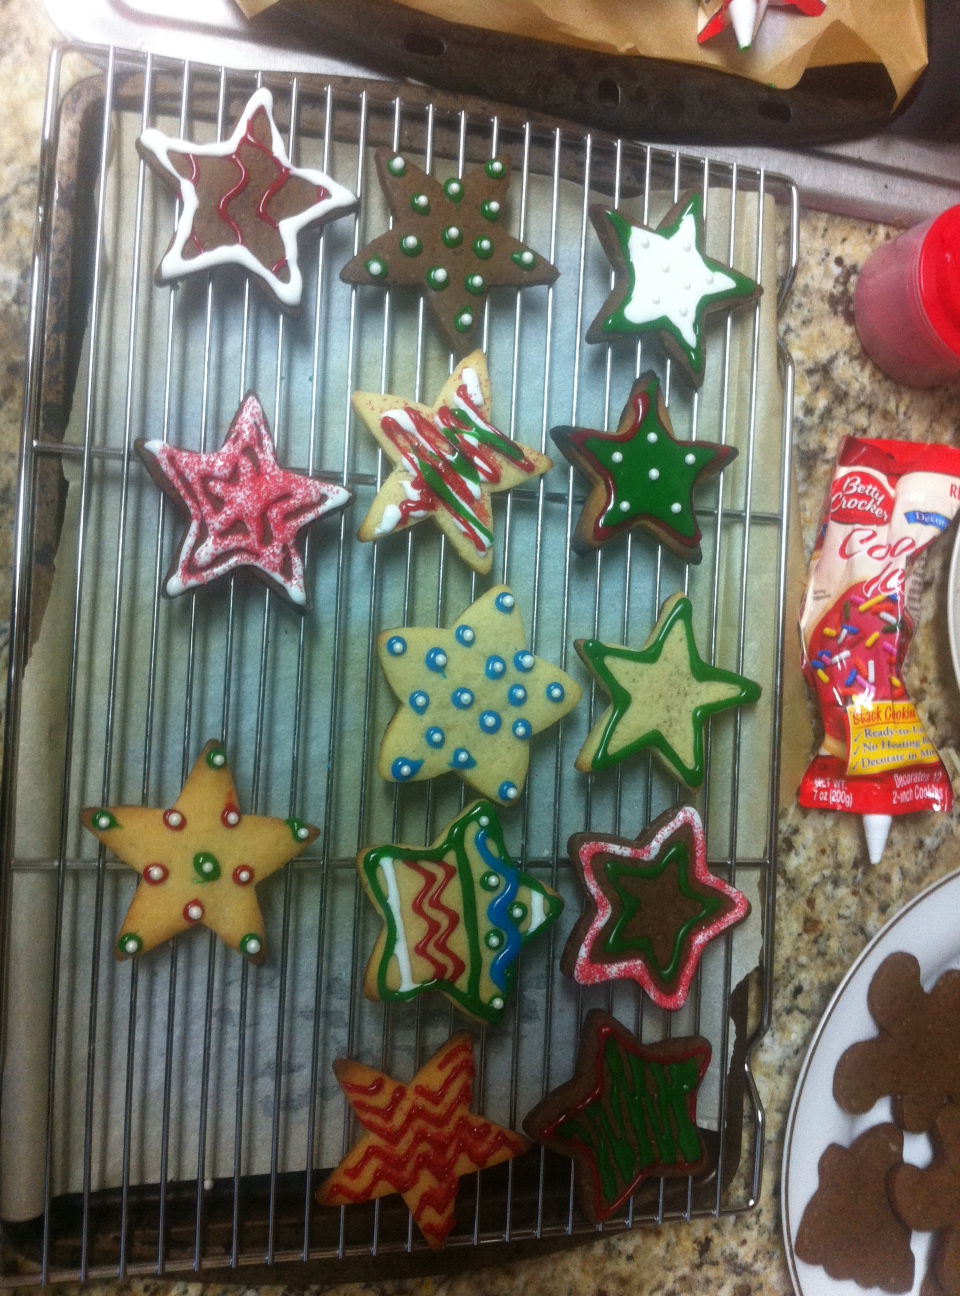
Here are some of the stars, out of the stars, gingerbread people, stockings, and trees that I did up this year. I actually prefer cookies without icing (actually, come down to it, I actually prefer bacon and cheese), but they are Not Festive. These cookies are Festive.
Ok, now to the more important steps: how to actually go about wrapping these up, getting them in the mail, and getting them safely to their destinations.
To accomplish this, you need:
- parchment or wax paper,
- tissue paper,
- festive fabric cut into patches about 7 x 11 (or thereabouts),
- aluminum foil,
- baggies – I used the little portioning bags that go inside bigger freezer bags. Sandwich bags would also work fine,
- and boxes. The boxes need to be bigger than you think, but not terribly big. I used USPS small flat rate boxes (dimensions 8 11/16″ x 5 7/16″ x 1 3/4″, according to the post office, and aren’t those just ridiculous dimensions?) to send out half-dozens.
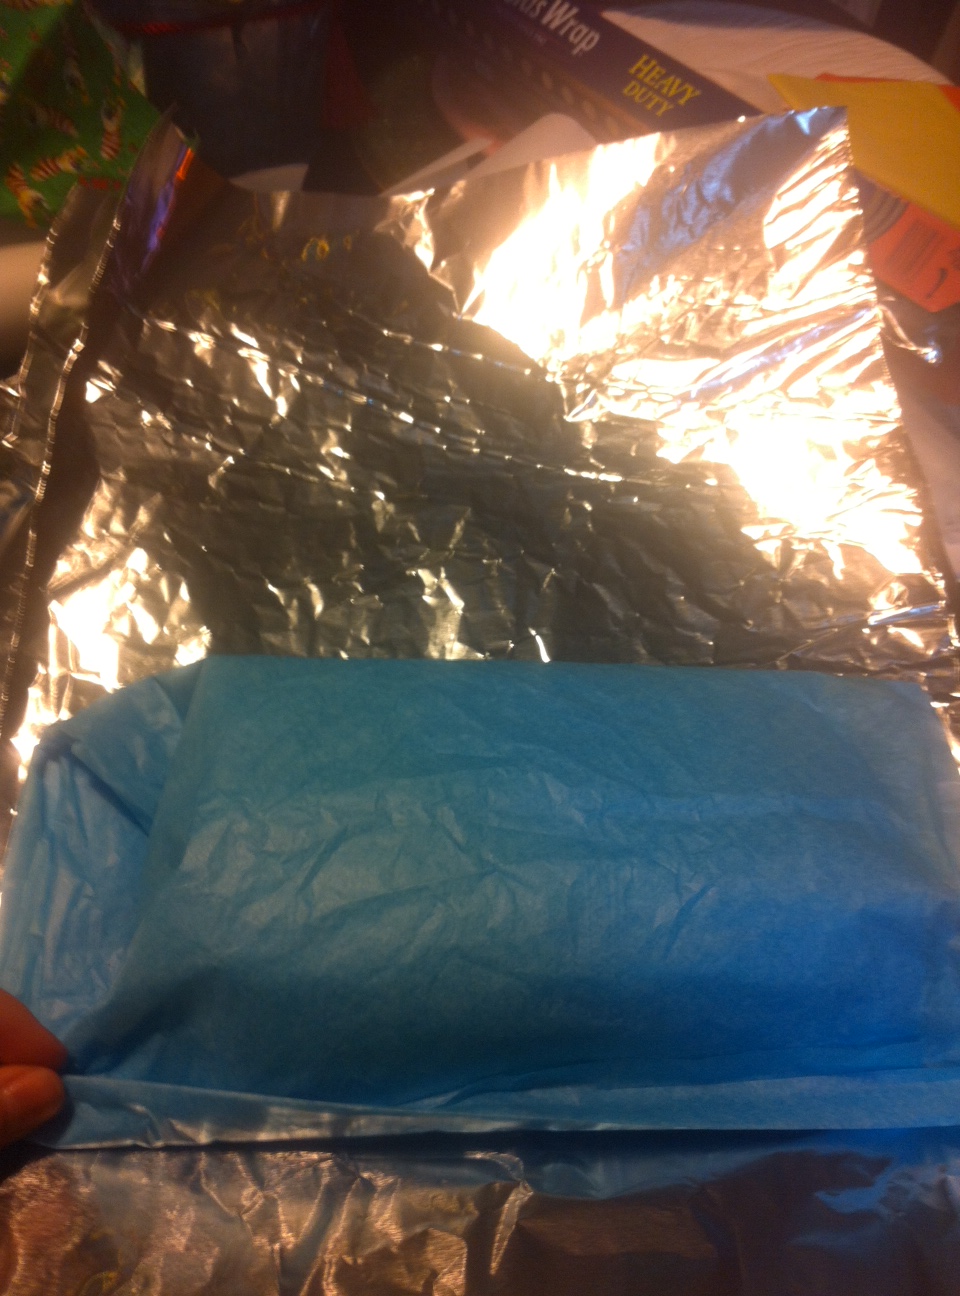
First, prep your wrapping for each package. Your aluminum foil should be in great sheets a little over twice the size of your boxes, then doubled over – or two sheets that are each a little over the size of the box. The tissue paper can be folded into quarters or halves, depending on the size of the sheets. It should be small enough to have an edge of foil all around. You want a double layer of aluminum foil, the tissue paper, and then the festive fabric, laid out on top of each other.
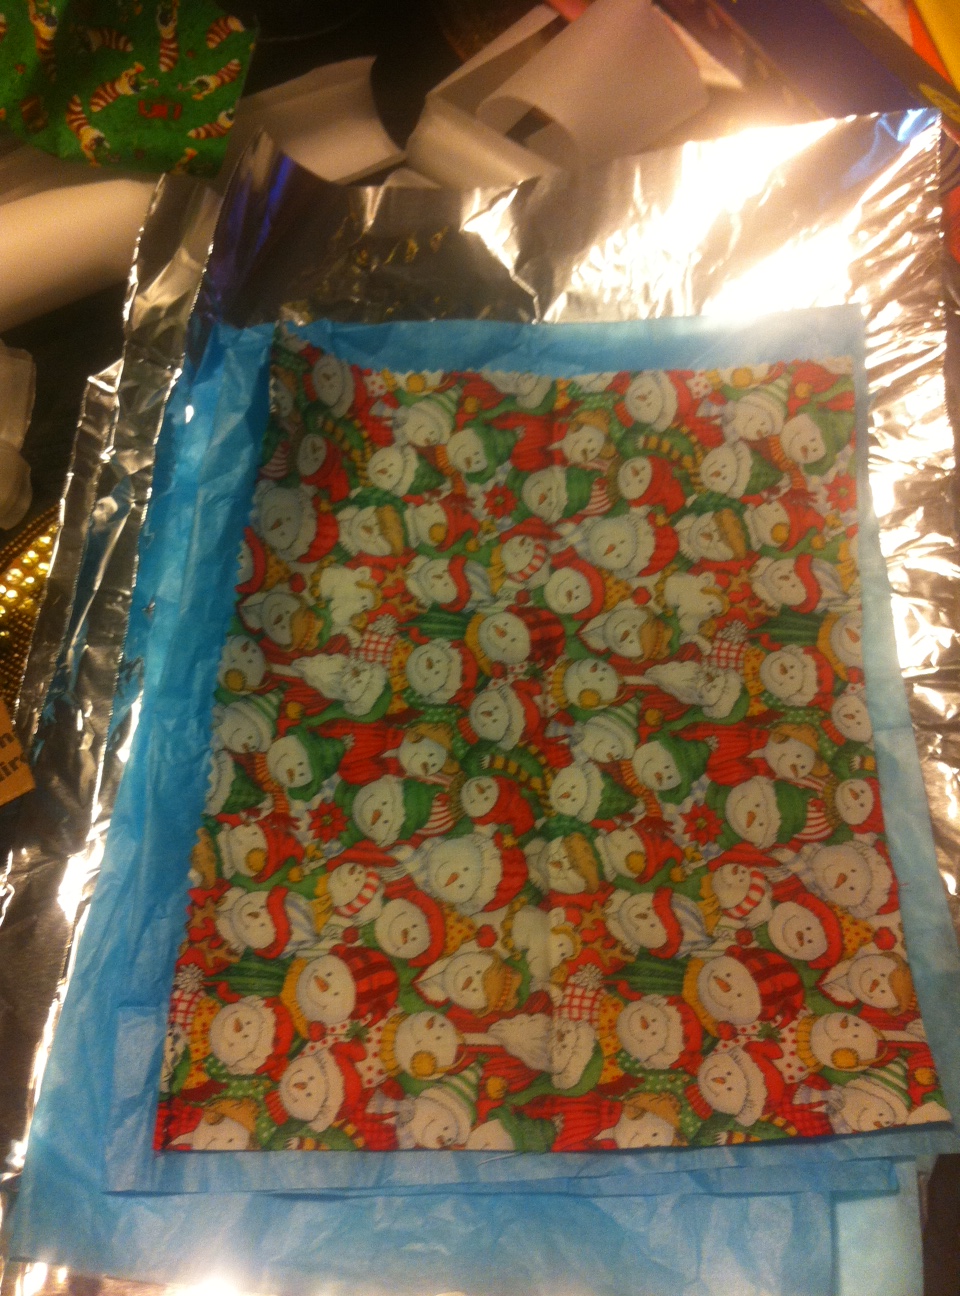
See, like this! There along the upper edge you can see curls of the parchment and wax paper I used to wrap the cookies.
Next, get your wax paper or parchment paper. I actually used a bit of both. Cut it off into strips that are wide enough to wrap up your cookies at least once around. Mine didn’t fold over beyond that, because they were going to have plenty of other layers.
Wrap each cookie, individually, in a strip of the wax paper. Stack them together in twos, threes, or fours, depending on the size of the shipment altogether, and then wrap those stacks in the baggie – close, but not tight.
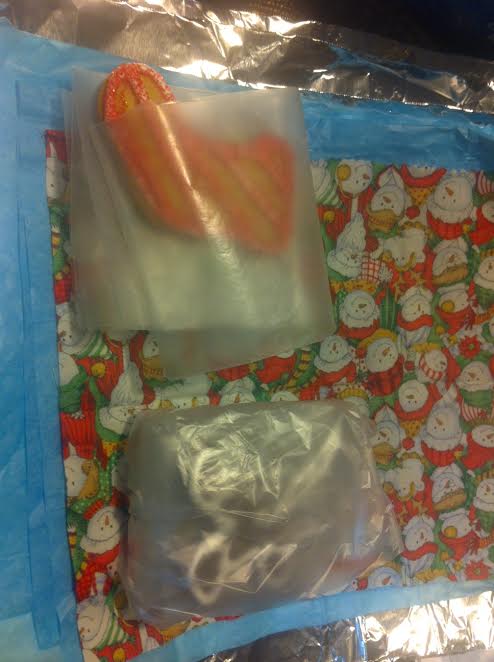
To the left is a stack of three cookies wrapped in the wax paper. To the right is the other stack of three for this packaged, which have been wrapped up in the baggie already.
Basically, you’re trying, first, to make sure that the icing of each cookie doesn’t rub up against the others and, second, to get the cookies in fairly stable stacks so that they lend each other stability.
From here, you just need to get each of those three layers of further wrapping tucked up around the cookies, like so:

One: fold the Festive Fabric over.
Two: fold the tissue paper over, and do your best to seal it with a bit of a crease. It won’t hold very well; it doesn’t need to.
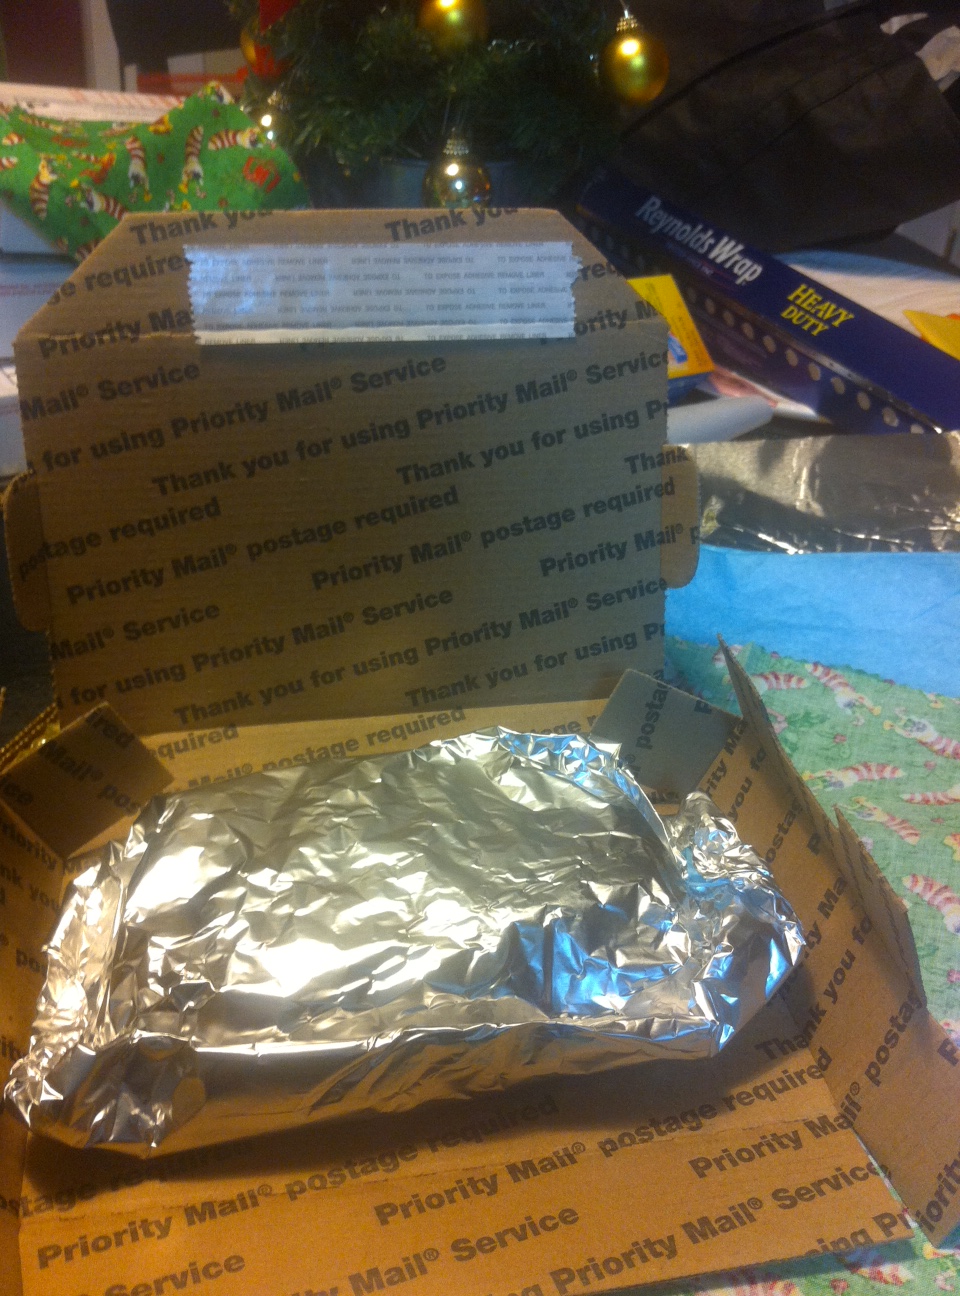
Three: fold the aluminum foil over and seal with folds on all three open sides. Yes, mine is already sitting in the box, but I promise you can easily move this little Package of Cookie into a box from wherever you are working.
Tada! Your cookies are ready to go in their shipping boxes, and each is carefully protected from this dire mailing process by five layers. The last, but still important thing, is to check that you’ve gotten your dimensions right for the package and the box. If there’s much space, make sure to fill it with something or your cookies will be rattled to bits. If there’s no space at all and it seems like a bit of a squeeze, Stop Immediately, or you will crush your cookies before they ever get beyond the garden gate.
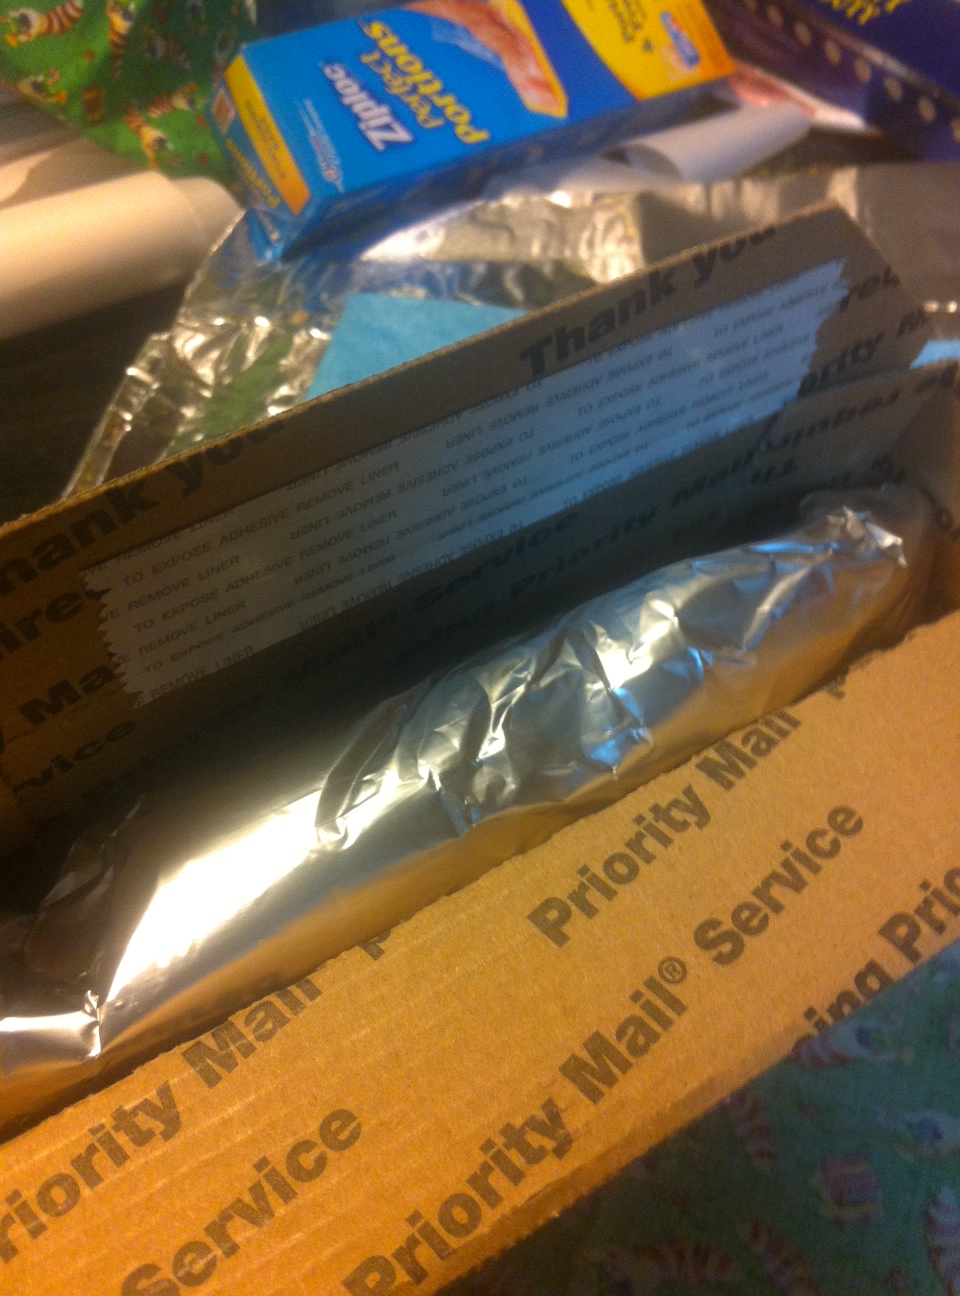
Like so, you see? So is good.
I went with the USPS FlatRate because they ran about five or six dollars to ship, and they were supposed to get there within two days – good time, for a cookie (mind, they didn’t, in every case, but they were meant to). You can also set the options so that the mail-people are supposed to leave the packages there, because everyone hates running around after packages (mind, they didn’t, in every case, but they were meant to).
So far as I know, no cookies were broken, and I was able to send a real present to several far away friends without spending fifty dollars on a fruit basket.
